Sunday, August 10, 2008

Flash tutorial: Change standard cursor!!!

This tutorial will help you to change the standard cursor into your expectant cursor which is suitable for your flash.
Please check this link: http://www.sitepoint.com/article/change-cursor-appearance

Sparkling Glass Effect in Flash

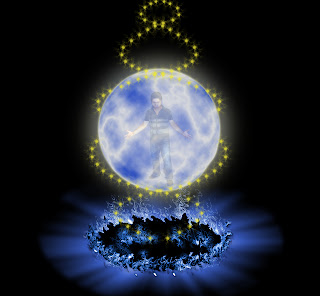
This tutorial will help you to create a sparkle effects which is useful to represent the shine of glass or star...

Please check this link: http://www.flashperfection.com/tutorials/Sparkling-Glass-Effect-19782.html

Monday, August 4, 2008

Character for my Flash project!!!


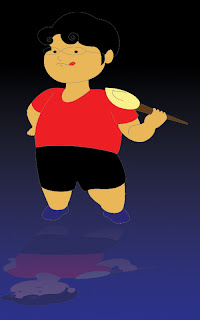
I try to make an Flash clip telling a story. This is one of my character appearing in my flash. Of courses, I will draw more detail for this character soon.

Sunday, August 3, 2008

Save the tigers poster!


Tigers are becoming disappeared. As a result, the protection for tigers are nescessary unless we wanna lose them forever. This poster is createsd for this purpose.


Sunday, July 20, 2008

Car tracing

Original


Outline
My dream

Hicc, exhauted!!!! (more than 300 layers >.<)

Type Creature

Hicc, the cynocephalus face I made last sem has Font problem so I have to create a new one for this entry (hicc, car tracing took me too much time )

Sunday, July 13, 2008

Bubbles!!!


Apply the technique to create glass sphere in last entry and a little bit more creation, we wil have the results like these images.

Glass Sphere!!!


Do you wanna make a glass sphere like magical sphere of wizard or witch? or even bubbles?

Today I will introduce you the technique to do this.

_Open needed file.(h01)

_Use elliptical marquee tool + shift to select(h02)

_Choose background color (h03 + h04)

_Use Paint Bucket Tool to paint this selected area

_Ctrl + D to deselect

_Choose layers table ---> add a new style --> inner shadow (h05)

_We have temporary result (h06)

_Create new layer. Select this layer then press Ctrl + Alt + G

_Change Backgroud color to 65645F

_Use Gradient tool, adjust like (h07)

_Click and drag from center like (h08) and (h09)

_Press (D)

_Add layer mask to this layer

_Use Gradient tool (in Option bar, choose Radial Gradient and deselect Reverse)

_Click and drag from center to edge of the sphere (h10)

_Duplicate Layer 1 (Ctrl + J) (h11)

_Move this copied layer (h12)

_Decrease this layer Fill to 0% (h13)

_Adjust Blending option index like (h14,15)

_We have temporary result (h16)

_Create New Layer

_Use Brush tool: soft brush--> select sensible size (h17)

_Choose background color = white---> click this tool to the sphere center --> Filter-->Gaussian Blur: Radius: 25

_In layer3, Ctrl + click to the icon of layer 1 to have the selection, add mask to layer 3

_Adjust layer 3 opacity= 30% (h18)

_Create layer4

_Use brush tool (Hard brush and sensible size)to make a circle on the sphere (h19)

_Gaussian Blur: Radius:5

_Add layer style (h20)

_ Select layer 1 copy, decrease Fill to 25% (h21,22)

_Create new layer under layer 1 (layer5)

_In layer5, Ctrl + select layer1 copy

_Press (D)

_Gradient tool (h23)

_Click and drag from center to the edge of the sphere

_Ctrl + T , click and drag like (h24)

_Move the shadow to the right (h25)

_Adjust Opacity = 50% , Filter---> Gaussian Blur, Radius: 2 px (h26,27)

_In layer 5, Ctrl + click layer 1

_Filter -->Distort--> Spherize--->amount=100% (normal) (h28,29)

_Apply this effect to layer1(background) (h30)

Collection.

Have fun!!!

Sunday, July 6, 2008

I'm hero ^.^


Heizaa!! I'm sure that everyone knew the 7 Dragonball manga. When I was a child, I dreamt that I also had the super power like characters in this manga. This means I can create an energy round myself. Of courses, this can't be.

However, with Photoshop, I can create this image which is looks like my dream.


Silhouette creation


Hi everyone!

Welcome to my first entry.

Let's look at the picture. I'm sure that you can regconize this is my portrait.

Heizaaa....(someone will insult me.... >.<)

Don't look at my portrait, please notice the silhouette. Creating silhouette(contrast) for an object is popular, especially in website and advertising. In this entry, I'll introduce to you how to use photoshop to make silhouette (contrast) for objects simply.

Let's start...

Firstly, you have an object and you want to make silhouette.

*Open a new paper with sensible size.

*Open file which contains object.

*Using selection tool to select the object that you want to make silhouette, drag and past to the paper that you have just opened.

*Ctrl (command) + J to make a copied layer

*Select this layer:

_ using edit--->transform---> flip vertical

_using edit---> transform---> distort : click and drag the corner of your object to sensible position.

_decrease opacity to 30%

_layer---->add mask layer--->reveal all

_using Gradient tool, click and drag down a line

That's the final step to make silhouette.

Have Fun.

Good luck!!!